
Things I want to do
Since the Dom object, which places HTML tags (DOM) on Phaser3, is used differently from other GameObjects, I will summarize its usage and points to note.
How to use
Prepare
To use DOM objects, you need to set the following configuration:
    dom :{
        createContainer: true
    },
For example, create and set the following configuration.
const config = {
    type: Phaser.AUTO,
    width: 300,
    height: 200,
    parent: 'game-container',
    backgroundColor: '#000000',
    scale: {
        mode: Phaser.Scale.FIT,
        autoCenter: Phaser.Scale.CENTER_BOTH
    },
    dom :{
        createContainer: true
    },
    scene: scene_array
};
Object creation
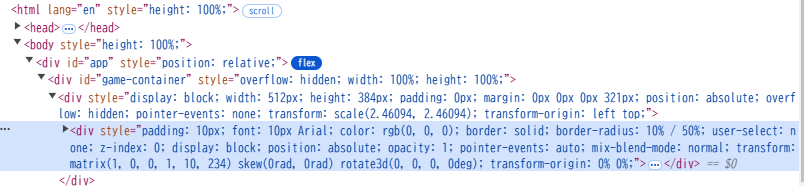
DOM objects are created within the Scene class as follows:
let el = document.createElement('div');
el.innerHTML = text
let dom = this.add.dom(x, y, el, style);
`document.createElement` is a standard JavaScript function, not a Phaser3 function.
We create an HTML element and pass it to add.dom to turn it into a Phaser3 object.
Memo
The added element can also be viewed in Debug View in browsers such as Chrome.
Event registration
This specifies the action that occurs when the created GameObject is clicked.
However, just like with other GameObjects, writing the code as follows did not work.
dom.setInteractive()
dom.on("pointerdown", (event) => {alert()})
Instead, we were able to set the click event by setting the event on the Element instead of the GameObject, as shown below.
let el = document.createElement('div');
el.innerHTML = text

el.onclick = ()=>{alert()};

let dom = this.add.dom(x, y, el, style);
コメント