
Things I want to do
When you copy an object in Blender, the material is also copied and saved under a different name. While you might sometimes want to apply different colors to the copied object, in most cases, the copied material is unnecessary.
This article summarizes how to organize copied materials.
The phenomenon I want to solve
If you copy the following cube
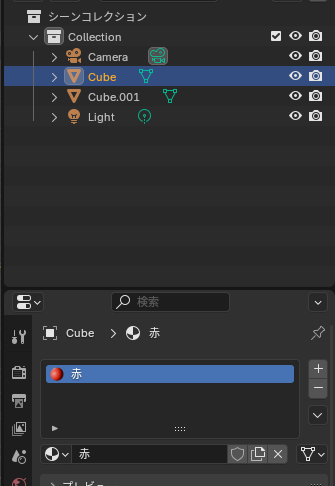
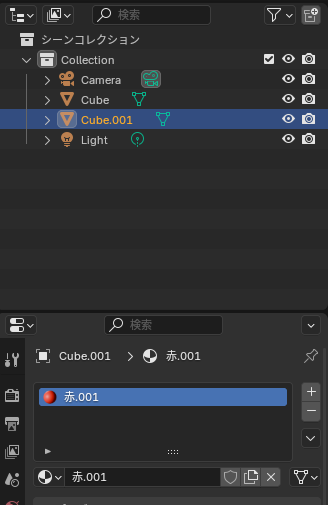
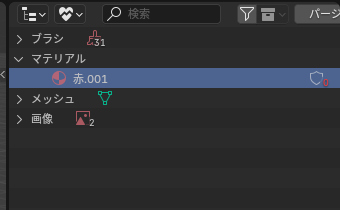
The material is also copied, and a new material (red.001) is created.
While separate settings are possible, in most cases, it’s preferable to combine them into one.
Same material settings
This applies the original material to the newly created object.
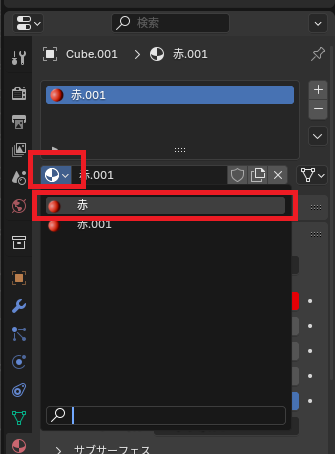
The destination material will be displayed.
Select the copied material (red.001) and click the ‘Browse Linked Materials’ icon below. Select the original material (red) from the dropdown menu.
With the above steps, the same material will now be used for both the source and destination objects.
Operation after integration
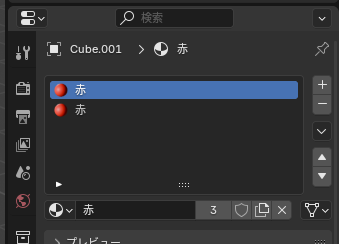
If you merge objects using the methods described above, without referencing the same material, the two objects will appear side by side as shown below.
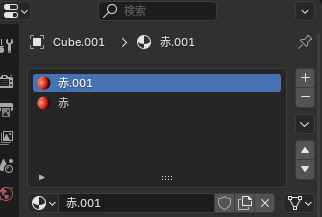
You can use the method described above to reference the original, but it will result in two identical materials being displayed.
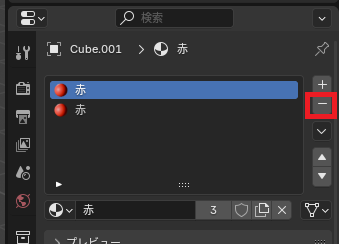
In that case, click the – icon to delete one of them.
Deleting unnecessary materials
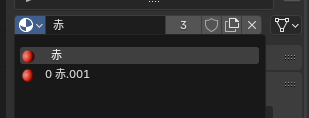
Although the number of materials used in the steps so far has decreased, unused materials (Red .001) have not been deleted. For example, clicking the ‘Browse Linked Materials’ icon will show Red .001 Morris.
Deletion procedure
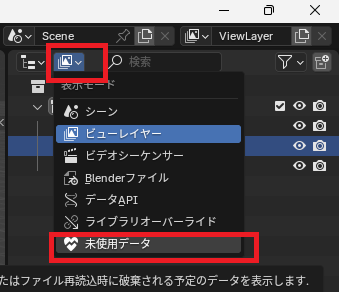
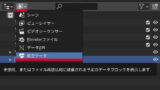
Click the display mode icon in the Outliner view (the view that displays the object hierarchy; it is initially in the upper right corner) and select ‘Unused Data’.
Select the material from the displayed list, right-click, and select Delete to remove it.
If you have multiple items, it’s easiest to select them all using Shift+click or Ctrl+click before selecting delete.
Result
I was able to delete the unnecessary materials that were created by the copy.
Websites I used as references

コメント