
Things I want to do
This smooths out the shadows (shades) of objects, making them appear more natural.
Environment
Blender:3.4.1
Use of smooth shades
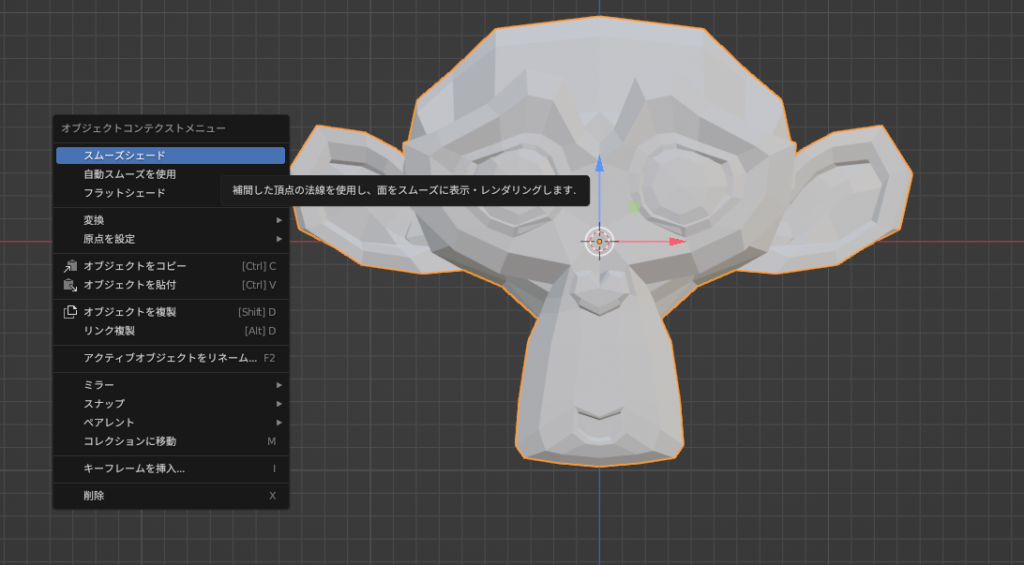
Switch to object mode from the top left of the screen.
Click on the target object to select it.
Right-click and select Smooth Shade.
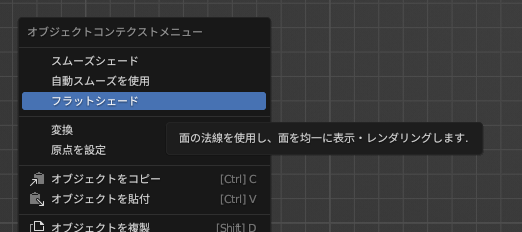
To revert to the normal shade before the change, select the target object and right-click, then select Flat Shade.
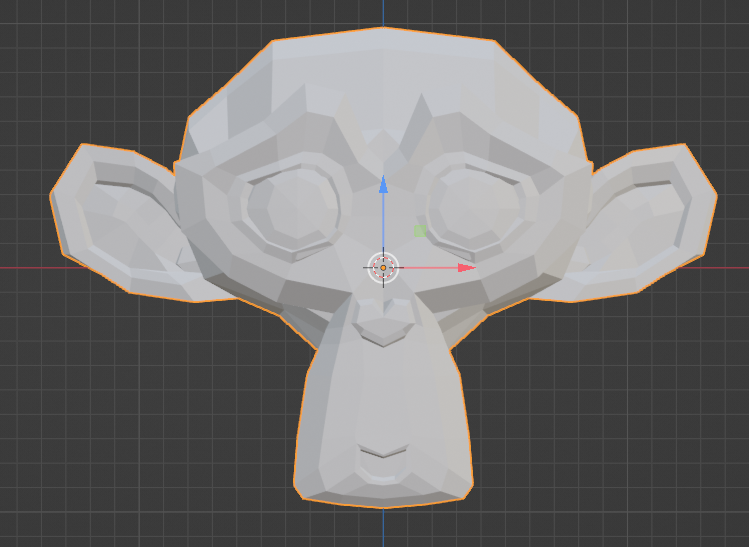
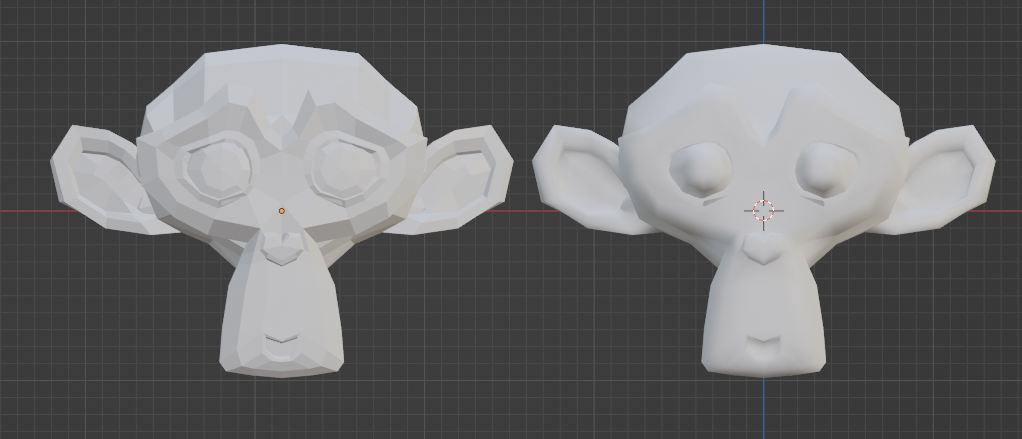
Result
Before change
After change
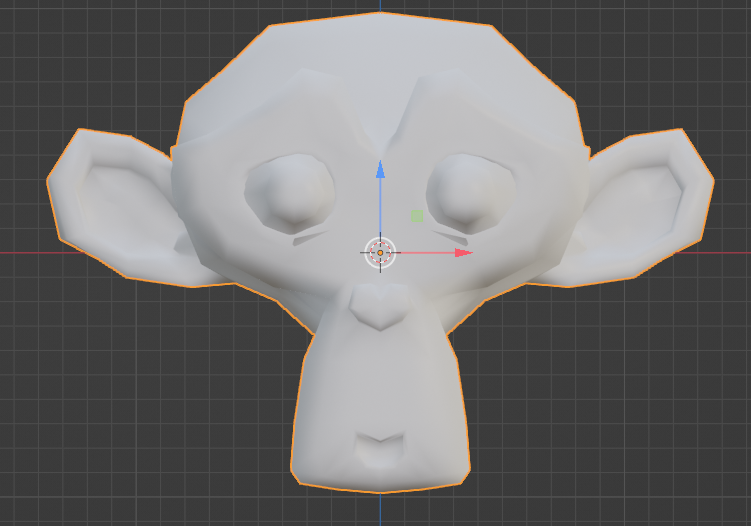
Comparing the before and after versions, the edges are less noticeable in the modified version, making it look more natural.
supplement
Impact of the settings
Smooth shading and flat shading can be set for each object.
Therefore, you can place objects with different shades (smooth shade/flat shade) in a single project, as shown below.
When you add an object, it will be applied using flat shading, so you will need to change it each time you use it with smooth shading. (You can select multiple objects and change them all at once.)
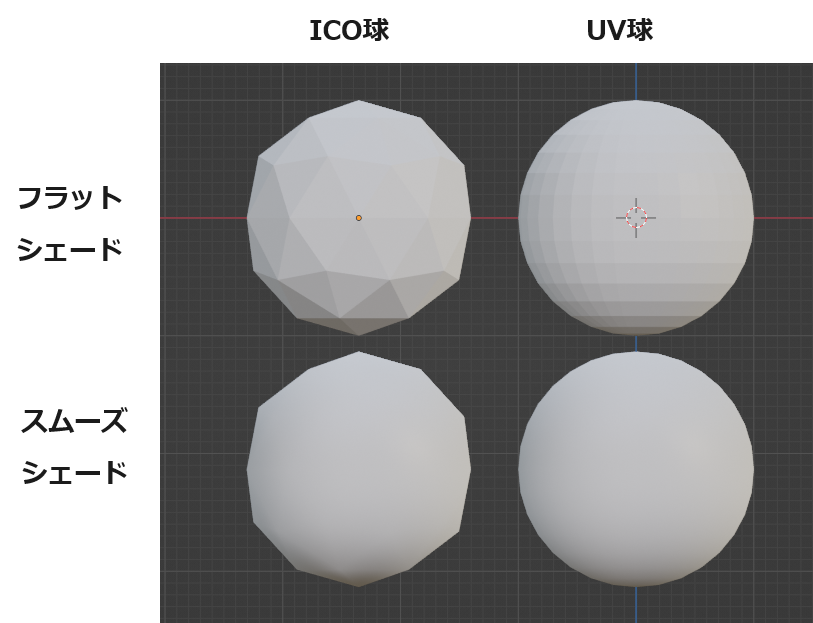
Compare ICO Sphere /UV Sphere
We will apply smooth shading and flat shading to ICO spheres and UV spheres respectively and compare the results.
Applying smooth shading to an ICO sphere results in fewer faces, but it appears smooth within the object. However, the boundaries remain jagged.
Setting the UV sphere smooth shade makes the polygons almost unnoticeable. (Of course, this depends on settings such as the number of faces in the UV sphere.)

コメント