
Things I want to do
Use StableDiffusion.cpp in server mode.
Advantages and disadvantages
First, let’s summarize the advantages and limitations of server mode so you can decide whether or not to use it.
advantage
When started in server mode, the model is cached, resulting in faster execution from the second time onwards.
You can prepare an HTML file and specify prompts and other elements from within that HTML.
Things that cannot be done
The only settings you can specify in a request are the prompt, number of images, image size, image format, and compression ratio. Detailed settings are not available. A server restart is required if you change the model being used.
environment setup
download
Download the appropriate Zip file for your environment from the following page.
If you want to run it on an AMD GPU, you need something with ‘vulkan’ or ‘rocm’ in its name.
(Basically, Vulkan should be fine. ROCM will likely have limitations on which GPUs can be used.)

This applies to NVidia GPUs with ‘CUDA’ in their name.
Incidentally, the method described in this article requires a fairly recent package. (It was tested on master-468-885e62e. It does not work on master-431-23fce0b (2025/12M).)
AVX512, AVX2, AVX, and NOAVX are CPU-based. Please check which AVX version is compatible with your CPU and download it. (I was mistaken, but it seems AMD CPUs can also use AVX. It’s easiest to ask an AI which version is compatible.)
Once you’ve extracted the downloaded file to a folder of your choice, you’re ready to go.
Prepare the HTML
Prepare the HTML in any location you like.
This article was saved as index.html using the following HTML.
<!DOCTYPE html>
<html lang="ja">

<head>
    <meta charset="UTF-8">
    <title>sd-cpp Web UI</title>
</head>

<body>

    <div>
        <h2>sd-cpp</h2>
        <textarea id="prompt" placeholder="Prompt...">a cat in space, digital art</textarea>

        <div class="controls">
            <select id="size">
                <option value="512x512">512x512</option>
                <option value="768x768">768x768</option>
                <option value="1024x1024">1024x1024</option>
            </select>
            <button id="genBtn" onclick="generate()">Generate</button>
        </div>
        <div id="status" class="status"></div>
        <div id="result"></div>
    </div>

    <script>
        async function generate() {
            const prompt = document.getElementById('prompt').value;
            const size = document.getElementById('size').value;
            const btn = document.getElementById('genBtn');
            const status = document.getElementById('status');
            const resultDiv = document.getElementById('result');

            btn.disabled = true;
            status.innerText = "Generating";
            resultDiv.innerHTML = "";

            try {
                const response = await fetch('/v1/images/generations', {
                    method: 'POST',
                    headers: { 'Content-Type': 'application/json' },
                    body: JSON.stringify({
                        prompt: prompt,
                        n: 1,
                        size: size,
                        response_format: "b64_json"
                    })
                });

                const jsonResponse = await response.json();

                if (jsonResponse.data && jsonResponse.data.length > 0) {
                    const b64Data = jsonResponse.data[0].b64_json;
                    const imgSrc = `data:image/png;base64,${b64Data}`;

                    resultDiv.innerHTML = `
                    <img src="${imgSrc}" alt="Generated Image">
                    <br>
                    <a href="${imgSrc}" download="generated.png" style="display:inline-block; margin-top:10px;">SAVE</a>
                `;
                    status.innerText = "DONE!!";
                } else {
                    throw new Error("Failed to generate image");
                }

            } catch (err) {
                console.error(err);
                status.innerText = "Error: " + err.message;
            } finally {
                btn.disabled = false;
            }
        }
    </script>

</body>

</html>execution
Server startup
Start the server with the following command.
sd-server.exe --listen-port 8888 --serve-html-path [path to created HTML] -s -1 Model information
Model information is provided via ‘-m modelpath,’ etc. These are the same startup arguments used with sd-cli.exe.
The -s -1 option specifies that a random seed should be used. Since the seed cannot be specified from the HTML, a random seed is used instead.
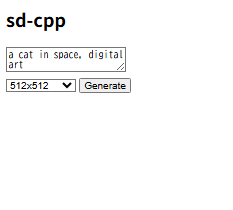
Once it starts up, in your browser… http://127.0.0.1:8888/ Access this page.
Once the image below appears, enter the prompt and click Generate to generate the image.
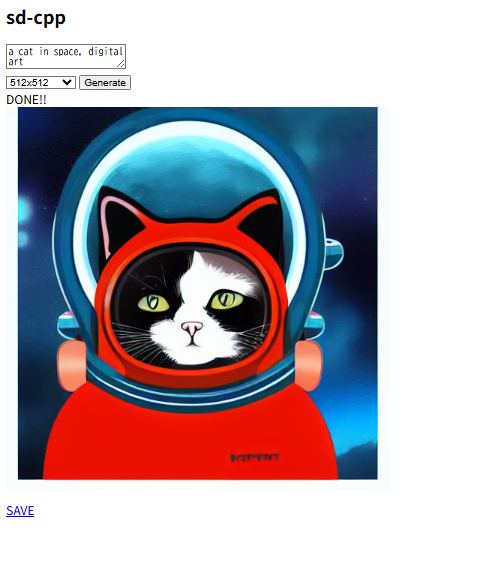
The image will be displayed as shown below once it is generated. Please note that it will not be saved locally.
Startup parameter example
Startup parameters in sd-cli
sd-cli -m Model path -p 'a lovely cat' -s -1
Startup parameters for sd-server
sd-server.exe --listen-port 8888 --serve-html-path [path to the created HTML file] -s -1 -m Model path
Please refer to the following page for startup parameters using sd-cli.
コメント