
Things I want to do
Create a hemispherical mesh based on the ICO sphere.
Even after creating an ICO sphere object and deleting its vertices, a perfect hemisphere cannot be created.
(Possible with UV bulbs)
Environment
Blender:3.4.1
OS: Windows 11
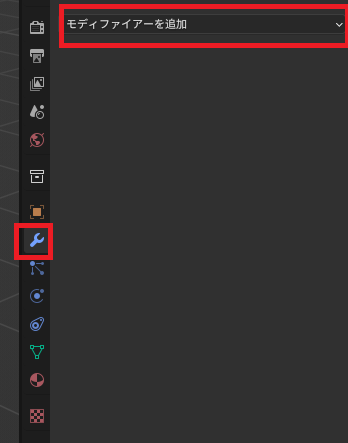
Use modifiers
Use a modifier to remove half of the sphere.
Prepare an ICO sphere that you want to make into a hemisphere, and a cube that covers half of the ICO sphere.

Switch to Object Mode and select the ICO sphere.
From the Modifier Properties tab, select ‘Add Modifier’.
Select ‘Boolean’ from the displayed list.
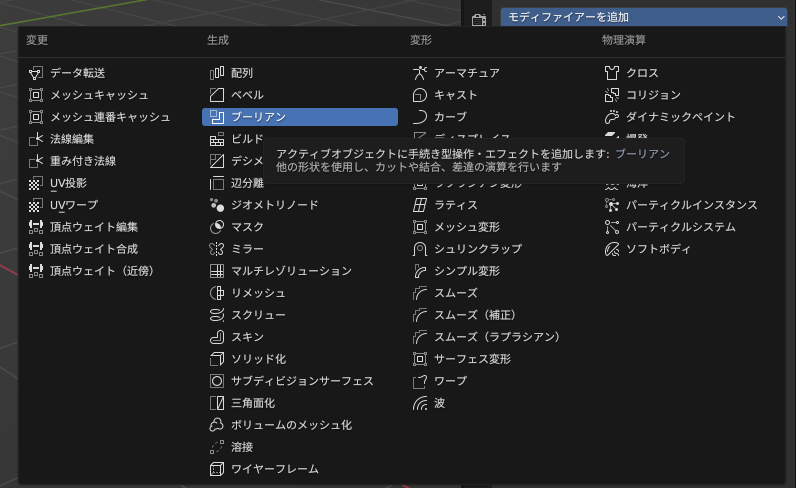
Select ‘Difference’ and then select a cube as the object.

If you hide the mesh object (cube) of the shape you want to open from the list, a hemisphere will be displayed.
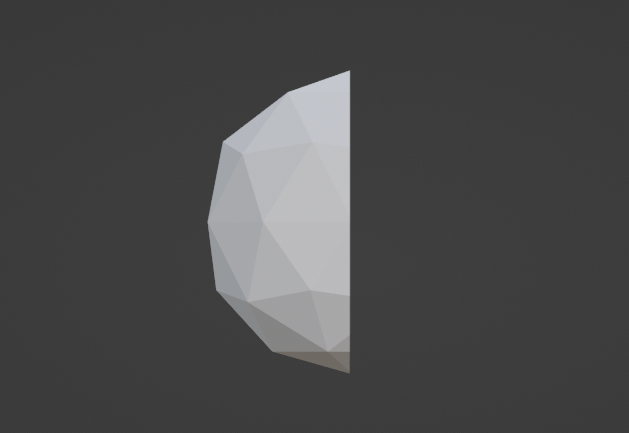
Be careful, because if you don’t hide the object, it will appear as if nothing is happening.
Convert to mesh
At this point, it might seem like we’ve created the desired mesh, but the mesh isn’t a hemisphere yet.
To make the mesh a hemisphere, the following steps are required:
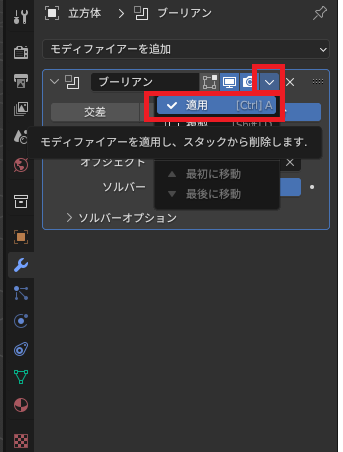
Click the down arrow next to the modifier you created, and then click ‘Apply’ from the menu that appears.
結果
A hemispherical mesh has been created.
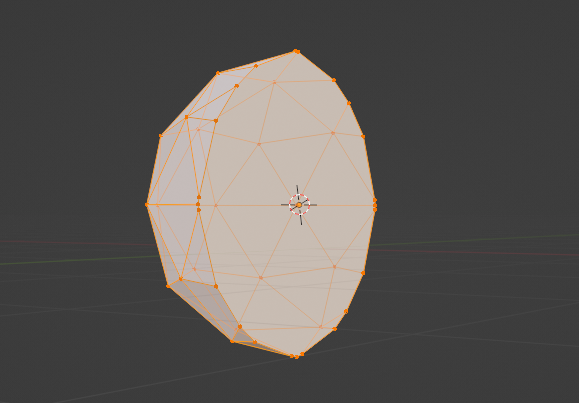
In this state, you can operate each point individually.
Other options
For UV spheres, you can create a hemisphere by deleting half of the vertices of the sphere and creating a new face.
However, considering the editing required after creating a hemisphere, I think it’s better to create it using an ICO sphere.

コメント