
Things I want to do
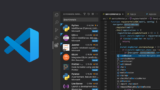
Development will be done using TypeScript (TS) with Visual Studio Code.
(Create a free development environment with a GUI for TypeScript)
Environment
OS : Windows11
Visual Studio Code:1.88.1
Node.js : 20.12.2
Environment setup
First, we’ll install the necessary tools to set up the development environment.
Installing Visual Studio Code
Download and install Visual Studio Code from the following link, choosing the version that best suits your environment.
(For most PCs, the x64 version of User Install should be fine.)
Installing Node.js
Download and install Node.js from the link below, choosing the version that suits your environment.
(Node.js is required for TypeScript development environments.)
Installing TypeScript
Execute the following command in the command prompt.
npm install -g typescriptTo check if it is installed correctly, run the following command in the command prompt.
tsc --versionIf the version number is displayed, it is installed correctly.
Creating a new project
Create configuration file
Create a development folder in any location. For this example, we created the following folder.
F:\TS\TESTOpen the command prompt and navigate to the project you created above.
F:
cd \TS\TEST
Execute the following command:
npm init -y
npx tsc --init
I tried creating a batch file and running it from Explorer, but it didn’t work.
If the following two files are created, the process was successful.
package.json
tsconfig.json
The project template is now complete.
Opening the project
Open the above settings in Visual Studio Code.
Open Visual Studio Code and select ‘File’ → ‘Open Folder…’ from the menu.
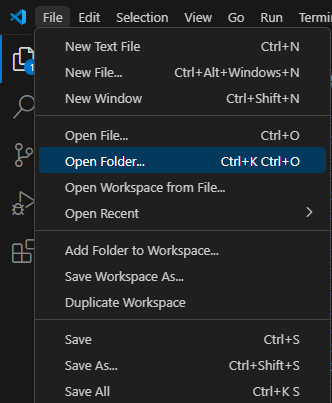
With the folder where you created the configuration file (in this case, F:\TS\TEST) open, click ‘Select Folder’.
I was able to open the project using the method described above.
Change settings
A list of files will appear on the left side of Visual Studio Code, so open tsconfig.json.
Enable the following commented-out settings.
"rootDir": "./"
"sourceMap": true
"outDir": "./"
Also, change the values of ‘rootDir’ and ‘outDir’ as follows:
"rootDir": "./src"
"outDir": "./build"
Creating source code
Create the source code.
Since we changed ‘rootDir’ to ‘./src’ earlier, the source code will now be created under ‘./src’.
Here, we will create ‘F:\TS\TEST\src\test.ts’.
The contents of test.ts are as follows:
const test_str:string = "TEST"; ////string型の変数に"TEST"を代入。TypeScript特有の記述
console.log(test_str); ////コンソールにtest_strを出力Build TypeScript
The files to be built are ready, so we will now proceed with the build.
Select ‘View’ → ‘Terminal’ from the top menu to launch the terminal (shell).
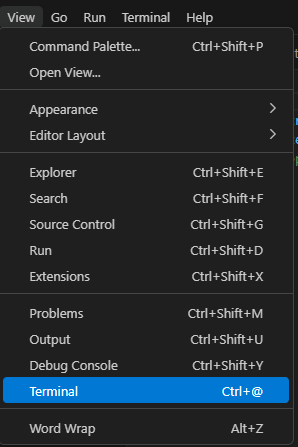
Enter and execute the following command in the displayed terminal.
tsc --buildIf ‘test.js’ and ‘test.js.map’ are generated in the ‘F:\TS\TEST\build’ folder, the build was successful.
If you see the following error, it may indicate that your environment is incorrect.
tsc : 用語 'tsc' は、コマンドレット、関数、スクリプト ファイル、または操作可能なプログラムの名前として認識されません。名前が正しく記述されていることを確認し、パスが含まれている場合はそのパスが正しいことを確認してから、再試行
してください。
発生場所 行:1 文字:1
+ tsc --version
+ ~~~
    + CategoryInfo          : ObjectNotFound: (tsc:String) [], CommandNotFoundException
    + FullyQualifiedErrorId : CommandNotFoundException
Please restart Visual Studio Code. If restarting doesn’t solve the problem, open a command prompt and run the following command to confirm that the version is displayed.
If the version is not displayed, it may not have been installed correctly, so please try installing it again.
tsc --versionIf you see the following error, you need to change your settings.
tsc : このシステムではスクリプトの実行が無効になっているため、ファイル C:\Users\xxxxxxxm\AppData\Roaming\npm\tsc.ps1 を読み込むことができません。詳細については、「about_Execution_Policies」(https://go.micro
soft.com/fwlink/?LinkID=135170) を参照してください。
発生場所 行:1 文字:1
+ tsc --version
+ ~~~
    + CategoryInfo          : セキュリティ エラー: (: ) []、PSSecurityException
+ FullyQualifiedErrorId : UnauthorizedAccess- Close Visual Studio Code
- Launch Visual Studio Code in administrator mode. (Right-click the icon and select ‘Run as administrator’)
- Enter and execute the following command in the terminal.
Set-ExecutionPolicy Unrestricted Once configured, you won’t need to start it in administrator mode again.
I think this setting change is necessary if you’re using Windows 11.
execution
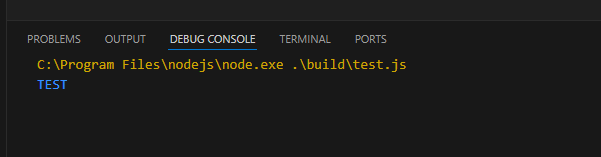
Open ‘test.js’.
Select ‘Run’ → ‘Start Debugging’ from the top menu.
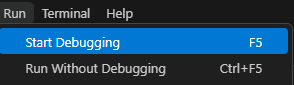
We were able to confirm that ‘TEST’ is displayed in the DEBUG CONSOLE as follows:
Result
Visual Studio Code can now build TypeScript and create/execute JavaScript files.

コメント